


11_SpringBoot_自定义starters
starters原理、自定义starters
starter:
-
这个场景需要用到的依赖是什么?
-
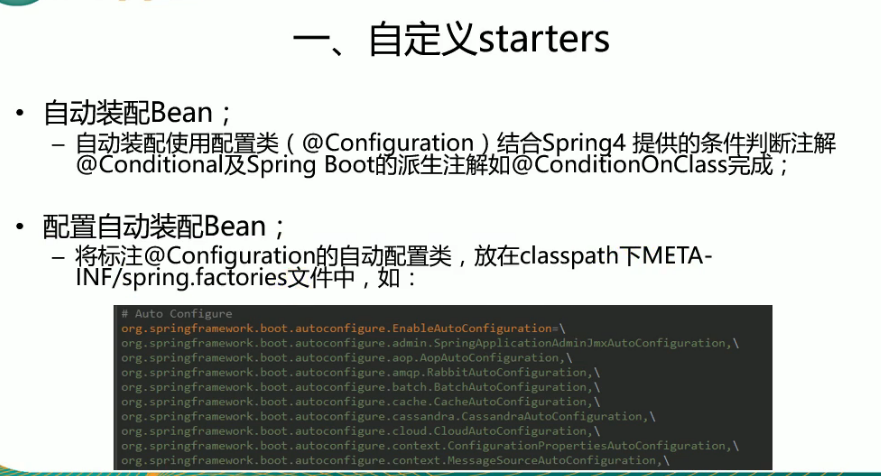
如何编写自动配置
@Configuration //指定这个类是一个配置类 @ConditionalOnXxx //在指定条件成立的情况下,自动配置类生效 @AutoConfigureOrder //自动配置类的顺序 @AutoConfigureAfter //在哪个自动配置类之后生效 @Bean // 给容器中添加组件 @ConfigurationProperties//结合相关的XxxProperties类来绑定相关的配置 @EnableCOnfigurationProperties//让XxxProperties类生效并加入到容器中,就可以自动装配了 // 自动配置类要能被加载,需要把这些自动配置类加入到/META-INF/spring.factories -
模式
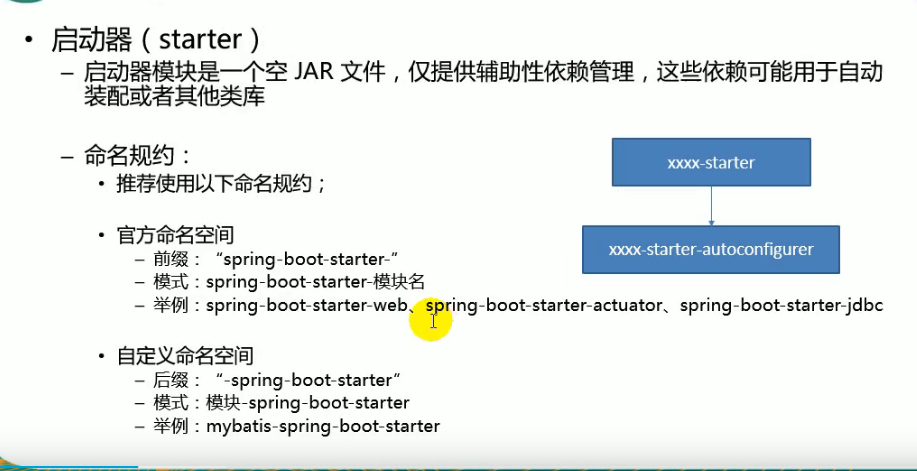
启动器只用来做依赖导入,然后专门写一个自动配置模块;
启动器来依赖自动配置模块,别人只需要引入启动器(starter);
自定义的启动器命名:类似mybatis-spring-boot-starter;
-
定义自己的starter
首先创建两个项目,一个作为启动器(starter),里面只需要引入自动配置模块即可,这里先创建一个Maven项目然后依赖自动配置模块;另一个项目则依赖SpringBoot启动器,然后编写相关自动配置需要的文件。
启动器项目:
命名为:tomxwd-spring-boot-starter
<!-- 启动器 -->
<dependencies>
    <!-- 引入自动配置模块 -->
    <dependency>
        <groupId>top.tomxwd.starter</groupId>
        <artifactId>tomxwd-spring-boot-starter-autoconfigurer</artifactId>
        <version>0.0.1-SNAPSHOT</version>
    </dependency>
</dependencies>
修改项目的pom文件即可。
自动配置模块:
命名为:tomxwd-spring-boot-starter-autoconfigurer
pom文件:
<dependencies>
    <!-- 引入SpringBoot-starter;所有starter的基本配置 -->
    <dependency>
        <groupId>org.springframework.boot</groupId>
        <artifactId>spring-boot-starter</artifactId>
    </dependency>
</dependencies>
编写一个组件(HelloService):
public class HelloService {

    HelloProperties helloProperties;

    public HelloProperties getHelloProperties() {
        return helloProperties;
    }

    public void setHelloProperties(HelloProperties helloProperties) {
        this.helloProperties = helloProperties;
    }

    public String sayHelloTomxwd(String name){
        return helloProperties.getPrefix()+"-"+name+helloProperties.getSuffix();
    }

}
编写自动配置类(HelloServiceAutoConfiguration):
@Configuration // 标明这是一个配置类
@ConditionalOnWebApplication//WEB应用的情况下,才生效
@EnableConfigurationProperties({HelloProperties.class})//导入配置文件
public class HelloServiceAutoConfiguration {

    @Autowired
    HelloProperties helloProperties;

    @Bean
    public HelloService helloService(){
        HelloService helloService = new HelloService();
        helloService.setHelloProperties(helloProperties);
        return helloService;
    }

}
编写属性类(HelloProperties):
@ConfigurationProperties(prefix = "tomxwd.hello")
public class HelloProperties {

    private String prefix;
    private String suffix;

    public String getPrefix() {
        return prefix;
    }

    public void setPrefix(String prefix) {
        this.prefix = prefix;
    }

    public String getSuffix() {
        return suffix;
    }

    public void setSuffix(String suffix) {
        this.suffix = suffix;
    }
}
然后再在类路径下创建META-INF文件夹,在该文件夹中创建一个spring.factories文件,然后把自动配置类交给EnableAutoConfiguration:
org.springframework.boot.autoconfigure.EnableAutoConfiguration=\
  top.tomxwd.starter.HelloServiceAutoConfiguration
然后进行打包,先打包自动配置模块,因为启动器依赖于这个自动配置模块。
打包完成后,进行测试,创建一个SpringBoot的Web 工程,在pom文件中进行依赖启动器:
<!-- 引入我们自定义的starter -->
<dependency>
    <groupId>top.tomxwd.starter</groupId>
    <artifactId>tomxwd-springboot-starter</artifactId>
    <version>1.0-SNAPSHOT</version>
</dependency>
编写一个Controller进行测试:
@RestController
public class HelloController {

    @Autowired
    private HelloService service;

    @GetMapping("/say")
    public String say(){
        String say = service.sayHelloTomxwd("哈哈");
        return say;
    }

}
在application.properties中进行配置:
tomxwd.hello.prefix=TOMXWD
tomxwd.hello.suffix=DONE
启动项目并进行访问,得到结果;
评论区